Mark-Making Tools You’re Probably Underusing
For mixed media artists, mark-making tools are often part of the core kit. Whether it’s underpainting with graphite, like Betty Franks Krause (Ep.10), or adding top-layer pastel, like Lynn Whipple (Ep. 23), mark-making tools are a mixed media staple at every layer.
Let’s take a look at some great mixed media options for making marks. Chances are, you already have several of these in your stash.

Image Credit: David Perkins
THE GRAPHITE PENCIL
Your handy-dandy pencil is one of the best options for mixed media mark making. Pencil happens to be Whipple’s final layer of choice (over her pastel marks), and it’s a critical part of Krause’s warm-ups and underlayers.
The reason? Graphite is unassuming and offers a lovely, subtle visual surprise. Its gray color is neutral, so it won’t fight your palette. It produces a narrow, variable line that adds variation, and it’s easy to grab.
Pencil lines also don’t wipe off easily. However, if you aren’t planning to frame a piece under glass, you’ll want to finish your work with a fixative or a careful layer of matte medium to make sure nothing rubs off.
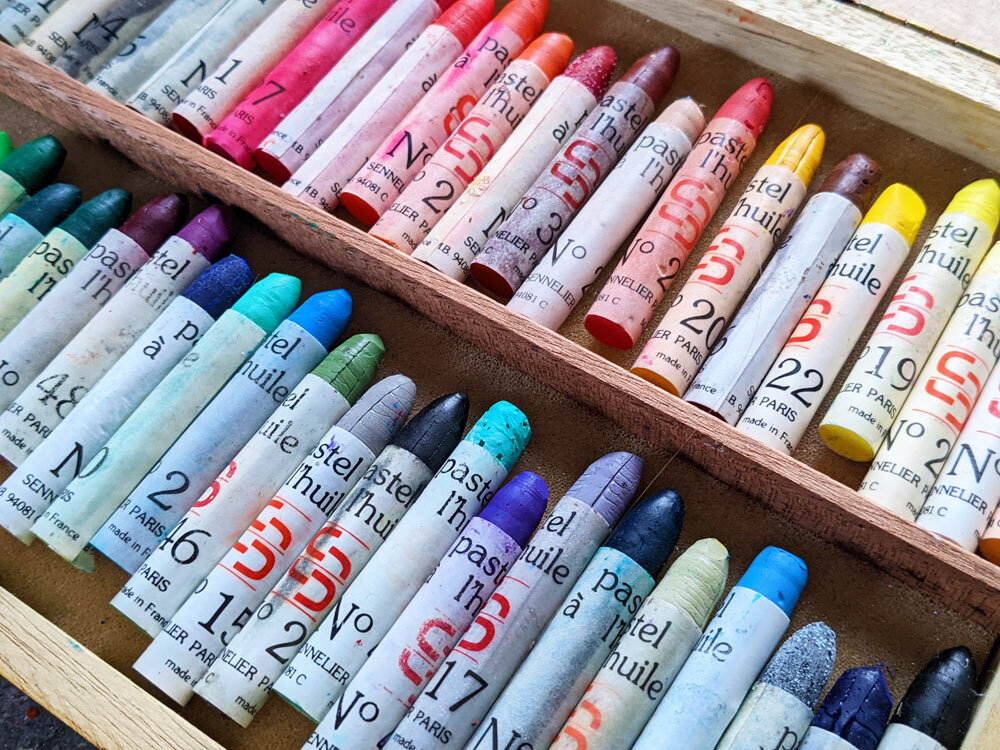
PASTEL
When it comes to pastels, there’s a lot to love. Color alone makes them a great option. Whipple reaches for soft pastels (chalk-like sticks of pure pigment) as her pre-graphite layer. She uses a fixative to hold the pastel in place, which darkens it just slightly.
Soft pastels aren’t your only option. Oil pastels are another fun choice, and they don’t rub off as easily. Like soft pastels, oil pastels come in dozens and dozens of spectacular colors.
Bonus: you may already have a stash from that pastel gift you received a decade ago.
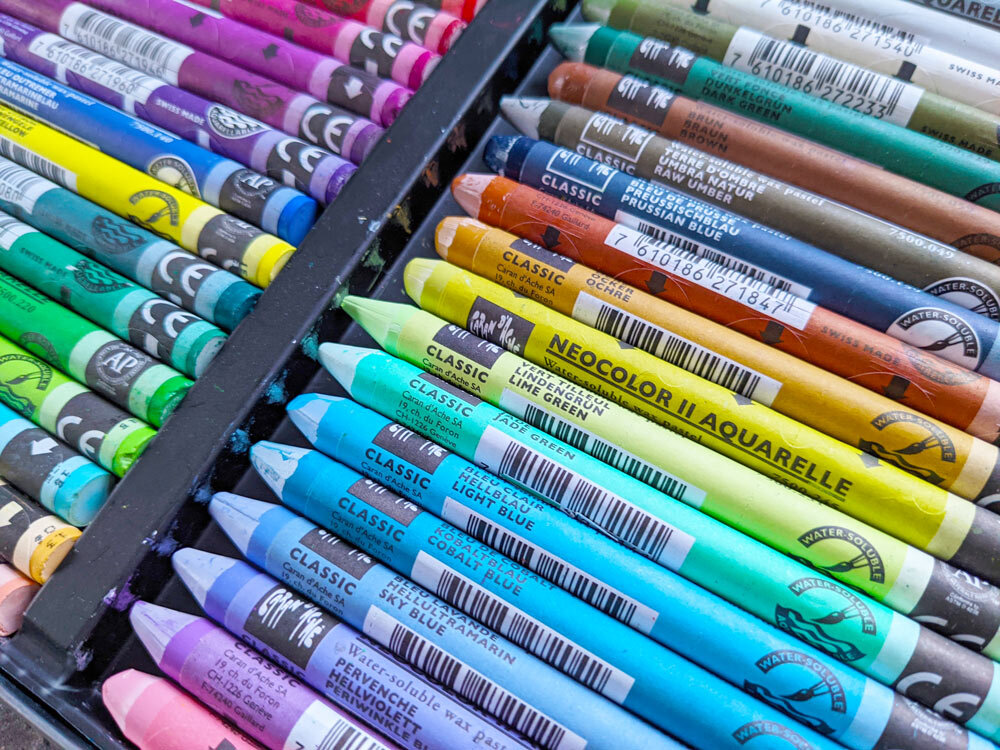
WAX PASTELS - Caran D’ache
If you want to go next-level with mark making, Caran d’Ache is worth a look. Their pastels are designed with mixed media artists in mind. There are two types: Neocolor I, which are wax-based and not water-soluble, and Neocolor II, which are water-soluble.
If you want to play with line, you can draw with a water-soluble Neocolor II and then hit it with a spritz of water to spread it out. These work beautifully in underpaintings, especially if you want to wipe some areas back or mix them with other colors.
If you’re looking for a line that won’t move, grab Neocolor I. You can cover them with opaque acrylic paint or draw directly on top.
Neocolors come in a wide range of colors, though not as many as traditional oil or soft pastels. The main downside is that the packaging for the water-soluble and non-water-soluble versions looks almost identical. It’s very easy to grab the wrong one when you need the other (speaking from personal experience). Other than that, they’re a joy to use.

PAINT PENS
Acrylic paint pens have come a long way in both quality and variety over the last decade. You can buy beautiful sets from Arteza or a wide range of sizes from Posca. Posca pens tend to offer the best coverage, and the range of nib sizes is especially useful.
Need a very specific color? No problem. You can mix your own by buying an empty acrylic pen and filling it with a custom blend of high-flow (airbrush) paint from Golden. Just be sure to keep extra nibs on hand. If a nib dries out, you won’t be able to get paint flowing through the pen.
Posca and Arteza pens have the best flow, but you’re limited to the colors available. Posca’s color range is still somewhat limited, though it’s slowly expanding. Arteza pens come in only one standard nib size.

Image Credit: Lucas George Wendt
COLORED PENCILS
Colored pencils are another great mixed media option. With an almost unlimited range of colors, it’s easy to find exactly the hue you want.
They can sometimes struggle on the slick, plastic-like surface of dried acrylic paint, but that’s an easy fix. Adding a medium to create a bit of tooth before your final layers makes a big difference. I like clear gesso with just a touch of matte medium mixed in.
Mark-making tools are a powerful addition to any mixed media toolkit. It takes some practice to learn where they work best within your layers, but each one offers a new way to bring your hand, your marks, and your voice into your work.
PUT IT TO PRACTICE
You don’t need to buy new tools to explore mixed media. You can learn a lot by using a single tool and noticing how it behaves at different points in your process.
Choose one mark-making tool you already own and use it in three ways on the same surface.
Underlayer
Start with loose, exploratory marks. Don’t aim for accuracy. Focus on movement, pressure, and variety. Let this layer stay imperfect.
Middle layer
Add paint or another medium over your marks. Notice what happens to the lower layers. Which marks disappear, which soften, and which push through? Treat this as useful information you can apply in future work.
Top layer
Return to your original mark-making tool or introduce a different one. Notice how it feels to work on top of paint. How well does the surface accept the mark?
If you’re using a light color, does it stay true or shift? What about darker colors? Take notes.
As you work, ask yourself:
Where does this tool feel most natural in the layering process?
Which marks disappear and which remain visible?
How easy or difficult is it to lay a mark down?
What changes when you treat marks as structure rather than decoration?
You don’t need to finish a painting. One small study is enough. The goal is simply to understand how each tool behaves so you can use it with more intention the next time it shows up in your work.
What are your favorite mark making tools for mixed media? Share below in the comments!
Get articles like this and new podcast episodes sent straight to your inbox by signing up for the newsletter below.